组件基础
在本章中,我们使用 odoo_owl 插件,它提供了一个简化的环境,仅包含 Owl 和一些其他文件。目标是学习 Owl 本身,而不依赖 Odoo 网页客户端代码。
环境准备
- 安装
odoo_owl - 安装完切换至 OdooOWL 菜单,显示如下:

- 🎉 恭喜你!模块已就绪,开始下面的学习吧
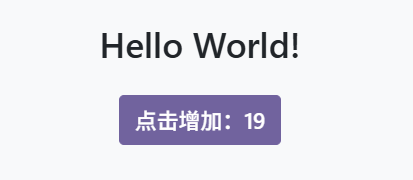
增加计数器功能
- 修改
playground.js,你需要使用 useState hook,创建响应式数据count - 在
playground.js组件中增开increment方法 - 修改
playground.xml中的模板,使其显示你的计数器变量。使用 t-esc 来输出数据。 - 在模板中添加一个按钮,并在按钮中指定 t-on-click 属性,以便在点击按钮时触发
increment方法。
实现效果:
参考代码
playground.js:
import { Component, useState } from "@odoo/owl";
import { registry } from "@web/core/registry";

export class Playground extends Component {
  static template = "odoo_owl.Playground";
  static props = ["*"];
  setup() {
    this.state = useState({
      count: 0,
    });
  }
  increment() {
    this.state.count++;
  }
}
//注册Action
registry.category("actions").add("odoo_owl.playground", Playground);playground.xml:
<?xml version="1.0" encoding="UTF-8"?>
<templates xml:space="preserve">
  <t t-name="odoo_owl.Playground">
    <div class="container mt-5">
      <h1 class="text-center mb-4">Hello World!</h1>
      <div class="text-center">
      <button class="btn btn-primary btn-lg" t-on-click="increment">
        点击增加:
        <t t-esc="state.count"/>
      </button>
      </div>
    </div>
  </t>
</templates>
小技巧
Odoo 浏览器下载的 JavaScript 文件是经过压缩的。为了便于调试,当文件未被压缩时会更容易。切换到 通过资源启用调试模式),以便文件不被压缩。
这个练习展示了 Owl 的一个重要特性:响应式系统。useState 函数会将一个值包装在一个代理对象中,这样 Owl 就可以跟踪每个组件需要状态的哪一部分,从而在某个值发生变化时自动更新对应的组件。你可以尝试移除 useState 函数,看看会发生什么。
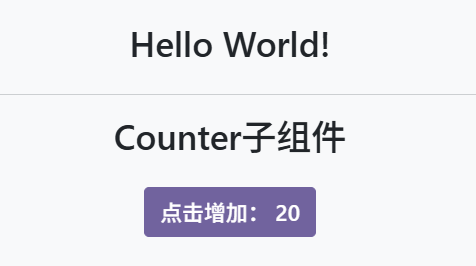
提取子组件
目前我们已经在 Playground 组件中实现了计数器的逻辑,但它无法被复用。让我们看看如何从中创建一个 子组件:
- 在
odoo_owl/static/src/目录下,创建一个新的Counter组件,提取Playground组件中的计数器代码至Counter组件中 - 在
Playground组件中导入Counter组件,注意是相对路径 - 在
Playground组件的模板中使用<Counter/>
实现效果:
参考代码:
Counter组件
counter.js
import { Component, useState } from "@odoo/owl";
export class Counter extends Component {
  static template = "odoo_owl.Counter";
  static props = ["*"];
  setup() {
    this.state = useState({
      count: 0,
    });
  }
  increment() {
    this.state.count++;
  }
}
counter.xml
<?xml version="1.0" encoding="UTF-8"?>
<templates xml:space="preserve">
  <t t-name="odoo_owl.Counter">
    <div class="text-center">
      <button class="btn btn-primary btn-lg" t-on-click="increment">
        点击增加:
        <t t-esc="state.count"/>
      </button>
    </div>
  </t>
</templates>
Playground组件
playground.js
import { Component } from "@odoo/owl";
import { registry } from "@web/core/registry";
import { Counter } from "./counter";
export class Playground extends Component {
  static template = "odoo_owl.Playground";
  static props = ["*"];
  static components = { Counter };
}
//注册Action
registry.category("actions").add("odoo_owl.playground", Playground);
playground.xml
<?xml version="1.0" encoding="UTF-8"?>
<templates xml:space="preserve">
<t t-name="odoo_owl.Playground">
<div class="container mt-5">
<h1 class="text-center mb-4">Hello World!</h1>
<hr/>
<h1 class="text-center mb-4">Counter子组件</h1>
<Counter/>
</div>
</t>
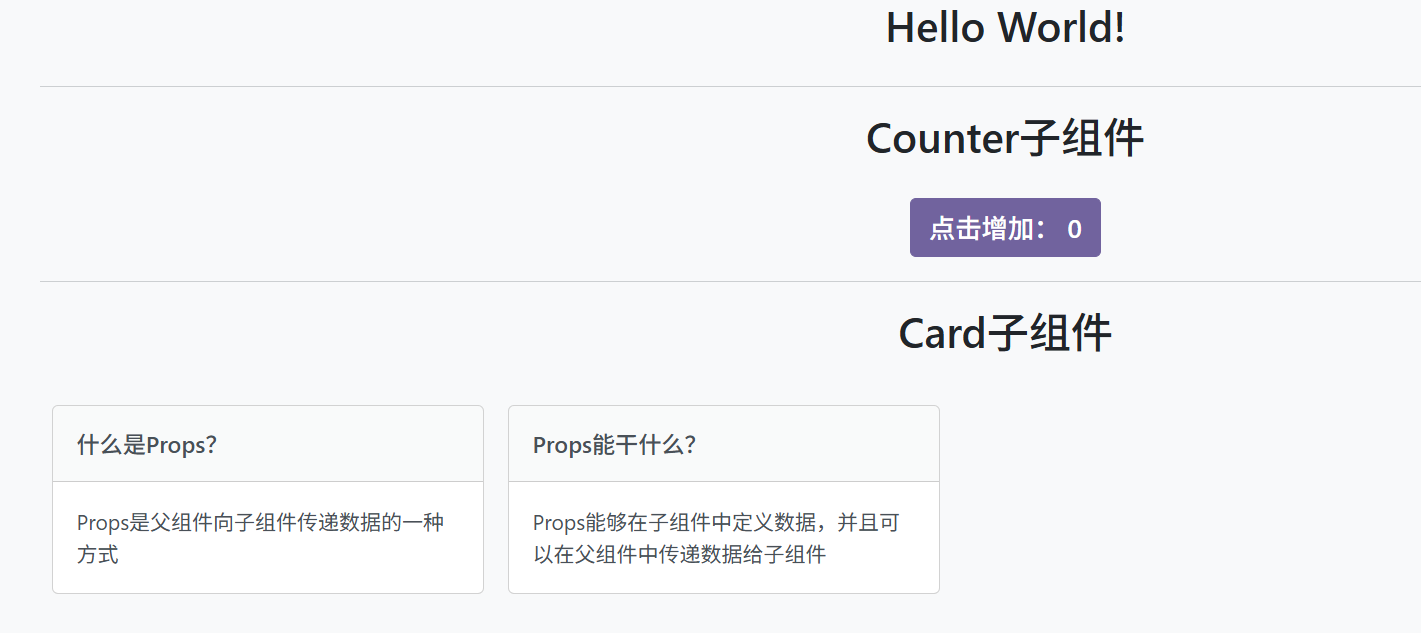
</templates>认识 Props
组件是将复杂的用户界面划分为多个可重用部分的最自然方式。但要使它们真正有用,有必要能够在它们之间传递一些信息。让我们看看如何通过属性(通常称为 props)让父组件向子组件提供信息
- 创建一个
Card组件 - 在
Playground中导入它,并在其模板中显示几张卡片
实现效果:
代码参考:
Card组件
card.js
import { Component } from "@odoo/owl";

export class Card extends Component {
  static template = "odoo_owl.Card";
  static props = {
    title: { type: String, optional: true },
    description: { type: String, optional: true },
  };
}
card.xml
<?xml version="1.0" encoding="UTF-8"?>
<templates xml:space="preserve">
  <t t-name="odoo_owl.Card">
    <div class="card d-inline-block m-2" style="width: 18rem;">
      <div class="card-header d-flex justify-content-between align-items-center">
        <h5 class="card-title mb-0">
          <t t-esc="props.title"/>
        </h5>
      </div>
      <div class="card-body">
        <p class="card-text">
          <t t-esc="props.description"/>
        </p>
      </div>
    </div>
  </t>
</templates>
Playground组件
playground.js
import { Component } from "@odoo/owl";
import { registry } from "@web/core/registry";
import { Counter } from "./counter";
import { Card } from "./card";
export class Playground extends Component {
  static template = "odoo_owl.Playground";
  static props = ["*"];
  static components = { Counter, Card };
}
//注册Action
registry.category("actions").add("odoo_owl.playground", Playground);
playground.xml
<?xml version="1.0" encoding="UTF-8"?>
<templates xml:space="preserve">
  <t t-name="odoo_owl.Playground">
    <div class="container mt-5">
      <h1 class="text-center mb-4">Hello World!</h1>
      <hr/>
      <h1 class="text-center mb-4">Counter子组件</h1>
      <Counter/>
      <hr/>
      <h1 class="text-center mb-4">Card子组件</h1>
      <Card title="'什么是Props?'" description="'Props是父组件向子组件传递数据的一种方式'" />
      <Card title="'Props能干什么?'" description="'Props能够在子组件中定义数据,并且可以在父组件中传递数据给子组件'" />
    </div>
  </t>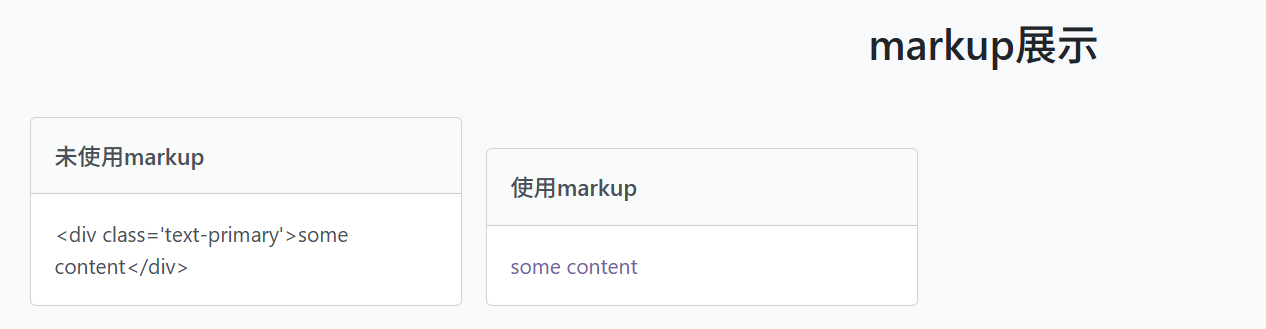
</templates>使用markup显示 HTM
在这之前的练习中我们使用了 t-esc,你可能会注意到 Owl 会自动转义其内容。例如,如果你尝试这样显示一些 HTML:<Card title="'my title'" content="this.html"/>,其中 this.html = "<div>some content</div>",那么最终的输出将只是将 HTML 作为字符串显示出来。
在这种情况下,由于 Card 组件可能用于显示任何类型的内容,允许用户显示一些 HTML 是合理的。这是通过 t-out 指令 实现的。
然而,将任意内容作为 HTML 显示是危险的,可能会被用来注入恶意代码,因此默认情况下,Owl 会始终转义字符串,除非它已被明确使用 markup 函数标记为安全。
- 将
Card更新为使用t-out - 将
Playground更新为导入markup,并在某些 HTML 值中使用它 - 确保您看到普通字符串始终会被转义,而标记字符串则不会。
实现效果:
代码参考:
修改:card.xml
<?xml version="1.0" encoding="UTF-8"?>
<templates xml:space="preserve">
  <t t-name="odoo_owl.Card">
    <div class="card d-inline-block m-2" style="width: 18rem;">
      <div class="card-header d-flex justify-content-between align-items-center">
        <h5 class="card-title mb-0">
          <t t-esc="props.title"/>
        </h5>
      </div>
      <div class="card-body">
        <p class="card-text">
          <t t-out="props.description"/>
        </p>
      </div>
    </div>
  </t>
</templates>修改:playground.js
import { Component, useState, markup } from "@odoo/owl";
import { registry } from "@web/core/registry";
import { Counter } from "./counter";
import { Card } from "./card";
export class Playground extends Component {
  static template = "odoo_owl.Playground";
  static props = ["*"];
  static components = { Counter, Card };
  setup() {
    this.state = useState({
      value1: "<div class='text-primary'>some content</div>",
      value2: markup("<div class='text-primary'>some content</div>"),
    });
  }
}
//注册Action
registry.category("actions").add("odoo_owl.playground", Playground);修改:playground.xml
<?xml version="1.0" encoding="UTF-8"?>
<templates xml:space="preserve">
  <t t-name="odoo_owl.Playground">
    <div class="container mt-5">
      <h1 class="text-center mb-4">Hello World!</h1>
      <hr/>
      <h1 class="text-center mb-4">Counter子组件</h1>
      <Counter/>
      <hr/>
      <h1 class="text-center mb-4">Card子组件</h1>
      <Card title="'什么是Props?'" description="'Props是父组件向子组件传递数据的一种方式'" />
      <Card title="'Props能干什么?'" description="'Props能够在子组件中定义数据,并且可以在父组件中传递数据给子组件'" />
      <hr/>
      <h1 class="text-center mb-4">markup展示</h1>
      <Card title="'未使用markup'" description="state.value1" />
      <Card title="'使用markup'" description="state.value2" />
    </div>
  </t>
</templates>
Props 验证
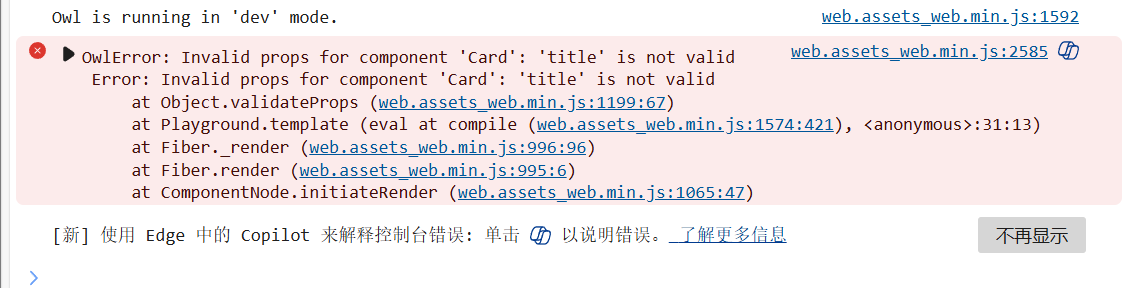
Card 组件有一个隐式的接口。它期望通过 props 接收两个字符串:title 和 description。让我们让这个接口更加明确。我们可以添加一个 props 定义, OWL 的 props 验证机制默认只在开发模式下启用,并且验证失败时通常是通过控制台打印错误
在
Card组件中添加 props 验证。在
Playground模板中更改title属性使其不满足你的验证条件,然后在浏览器开发者工具的控制台选项卡中检查是否能看到错误信息。
实现效果:
代码参考:
修改:card.js
import { Component } from "@odoo/owl";

export class Card extends Component {
  static template = "odoo_owl.Card";
  static props = {
    title: {
      type: String,
      optional: true,
      validate: (t) => t != "Props验证",
    },
    description: { type: String, optional: true },
  };
}修改:playground.xml
<?xml version="1.0" encoding="UTF-8"?>
<templates xml:space="preserve">
  <t t-name="odoo_owl.Playground">
    <div class="container mt-5">
      <h1 class="text-center mb-4">Hello World!</h1>
      <hr/>
      <h1 class="text-center mb-4">Counter子组件</h1>
      <Counter/>
      <hr/>
      <h1 class="text-center mb-4">Card子组件</h1>
      <Card title="'什么是Props?'" description="'Props是父组件向子组件传递数据的一种方式'" />
      <Card title="'Props能干什么?'" description="'Props能够在子组件中定义数据,并且可以在父组件中传递数据给子组件'" />
      <hr/>
      <h1 class="text-center mb-4">markup展示</h1>
      <Card title="'未使用markup'" description="state.value1" />
      <Card title="'使用markup'" description="state.value2" />
      <hr/>
      <h1 class="text-center mb-4">Props验证</h1>
      <Card title="'Props验证'" description="'如果title设置为:Props验证则报错'" />
    </div>
  </t>
</templates>
父子组件通信
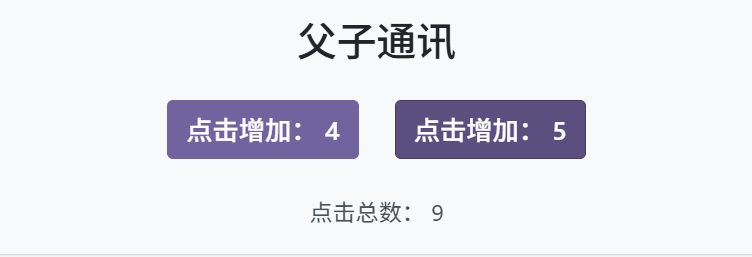
我们之前在练习中看到,props可以用于从父组件向子组件传递信息。现在,让我们看看如何反向传递信息:在这个练习中,我们希望显示两个 Counter 组件,并在它们下方显示它们值的总和。因此,父组件(Playground)需要在任何一个 Counter 的值发生变化时得到通知。
这可以通过使用一个 回调属性 来实现:也就是一个作为属性传入的函数,目的是在子组件中被调用。子组件可以根据需要,用任何参数调用这个函数。
在我们的例子中,我们将简单地添加一个 可选的 onIncrement 属性,它会在 Counter 组件被递增时被调用。
- 为
Counter组件添加属性验证:它应该接受一个可选的onIncrement函数属性。 - 将
Counter组件更新为在每次递增时调用onIncrement属性(如果存在的话)。 - 将
Playground组件修改为维护一个本地状态值(sum),初始值设为 0,并在其模板中显示它 - 在
Playground中实现incrementSum方法 - 将该方法作为属性传递给两个或更多
Counter子组件。
实现效果:
参考代码:
Counter组件
counter.js
import { Component, useState } from "@odoo/owl";
export class Counter extends Component {
  static template = "odoo_owl.Counter";
  static props = {
    onIncrement: { type: Function, optional: true },
  };
  setup() {
    this.state = useState({
      count: 0,
    });
  }
  increment() {
    this.state.count++;
    if (typeof this.props.onIncrement === "function") {
      this.props.onIncrement();
    }
  }
}
counter.xml
<?xml version="1.0" encoding="UTF-8"?>
<templates xml:space="preserve">
  <t t-name="odoo_owl.Counter">
    <button class="btn btn-primary btn-lg" t-on-click="increment">
        点击增加:
      <t t-esc="state.count"/>
    </button>
  </t>
</templates>
Playground组件
playground.js
import { Component, useState, markup } from "@odoo/owl";
import { registry } from "@web/core/registry";
import { Counter } from "./counter";
import { Card } from "./card";
export class Playground extends Component {
  static template = "odoo_owl.Playground";
  static props = ["*"];
  static components = { Counter, Card };
  setup() {
    this.state = useState({
      value1: "<div class='text-primary'>some content</div>",
      value2: markup("<div class='text-primary'>some content</div>"),
      sum: 0,
    });
  }
  incrementSum() {
    this.state.sum++;
  }
}
//注册Action
registry.category("actions").add("odoo_owl.playground", Playground);
playground.xml
<?xml version="1.0" encoding="UTF-8"?>
<templates xml:space="preserve">
  <t t-name="odoo_owl.Playground">
    <div style="text-align: center;height: 100%;overflow-x: auto;">
      <h1 class="text-center mb-4">Hello World!</h1>
      <hr/>
      <h1 class="text-center mb-4">Counter子组件</h1>
      <Counter/>
      <hr/>
      <h1 class="text-center mb-4">Card子组件</h1>
      <Card title="'什么是Props?'" description="'Props是父组件向子组件传递数据的一种方式'" />
      <Card title="'Props能干什么?'" description="'Props能够在子组件中定义数据,并且可以在父组件中传递数据给子组件'" />
      <hr/>
      <h1 class="text-center mb-4">markup展示</h1>
      <Card title="'未使用markup'" description="state.value1" />
      <Card title="'使用markup'" description="state.value2" />
      <hr/>
      <h1 class="text-center mb-4">Props验证</h1>
      <Card title="'Props验证....'" description="'如果title设置为:Props验证则报错'" />
      <hr/>
      <h1 class="text-center mb-4">父子通讯</h1>
      <div class="d-flex justify-content-center align-items-center gap-4 mb-4">
        <Counter onIncrement.bind="incrementSum"/>
        <Counter onIncrement.bind="incrementSum"/>
      </div>
      <div class="text-center">
        <p class="fs-5">点击总数:
          <t t-esc="state.sum"/>
        </p>
      </div>
    </div>
  </t>
</templates>
认识 t-foreach
现在让我们通过创建一个待办事项列表来了解 Owl 的各种功能。我们需要两个组件:一个 TodoList 组件,用于显示多个 TodoItem 组件。待办事项的列表是一个状态,应由 TodoList 来维护。
在本教程中,一个 todo 是一个包含三个属性:
id(数字类型):唯一标识该任务description(字符串类型):任务的描述内容isCompleted(布尔类型):标记该任务是否已完成
{ "id": 3, "description": "buy milk", "isCompleted": false }- 创建
TodoList和TodoItem组件 TodoItem组件应该接收一个todo作为属性,并在div中显示其id和description。- 使用 t-foreach 在
TodoItem中显示每个待办事项。 - 为
TodoItem添加属性验证。
注解
由于
TodoList和TodoItem组件耦合度非常高,将它们放在同一个文件夹中是合理的。t-foreach指令在 Owl 中与 QWeb 的 Python 实现并不完全相同:它需要一个t-key唯一值,以便 Owl 能够正确地对齐每个元素。注册新的
action,使它显示在新的menuitem中,注册代码如下:
registry.category("actions").add("odoo_owl.todo", TodoList);实现效果:

参考代码:
TodoItem组件
odoo_owl/static/src/todo/todoitem.js
import { Component } from "@odoo/owl";

export class TodoItem extends Component {
  static template = "odoo_owl.TodoItem";
  static props = {
    todo: {
      type: Array,
      validate(todo) {
        return (
          typeof todo.id === "number" &&
          typeof todo.description === "string" &&
          typeof todo.isCompleted === "boolean"
        );
      },
    },
  };
}
odoo_owl/static/src/todo/todoitem.xml
<?xml version="1.0" encoding="UTF-8"?>
<templates xml:space="preserve">
  <t t-name="odoo_owl.TodoItem">
    <div class="d-flex align-items-center justify-content-between p-2 border rounded mb-2">
      <div class="form-check">
        <span><t t-esc="props.todo.id"/>. </span>
        <label
          class="form-check-label"
        >
          <t t-esc="props.todo.description" />
        </label>
      </div>
    </div>
  </t>
</templates>
TodoList组件
odoo_owl/static/src/todo/todolist.js
import { Component, useState } from "@odoo/owl";
import { registry } from "@web/core/registry";
import { TodoItem } from "./todoitem";
export class TodoList extends Component {
  static template = "odoo_owl.TodoList";
  static components = { TodoItem };
  static props = ["*"];
  setup() {
    this.todos = useState([
      { id: 1, description: "学习Odoo框架", isCompleted: false },
      { id: 2, description: "学习OdooOWL", isCompleted: false },
    ]);
  }
}
//注册Action
registry.category("actions").add("odoo_owl.todo", TodoList);
odoo_owl/static/src/todo/todolist.xml
<?xml version="1.0" encoding="UTF-8"?>
<templates xml:space="preserve">
  <t t-name="odoo_owl.TodoList">
    <div style="text-align: center; max-height: 400px; overflow-y: auto; padding: 1rem;">
      <div style="max-width: 500px; margin: 0 auto;">
        <t t-foreach="this.todos" t-as="todo" t-key="todo.id">
          <TodoItem todo="todo" />
        </t>
      </div>
    </div>
  </t>
</templates>
MenuViews菜单
odoo_owl/views/menu_views.xml
<odoo>
    <data>
        <record model="ir.actions.client" id="OdooOWL">
            <field name="name">Playground</field>
            <field name="tag">odoo_owl.playground</field>
        </record>
        <record model="ir.actions.client" id="OdooTodo">
            <field name="name">Todo</field>
            <field name="tag">odoo_owl.todo</field>
        </record>
        <menuitem name="Odoo OWL" id="odoo_owl.menu_root" groups="base.group_user"
            web_icon="odoo_owl,static/description/icon.png" />
        <menuitem name="Playground" id="odoo_owl.playground_menu"
            parent="odoo_owl.menu_root"
            action="OdooOWL" sequence="10" />
        <menuitem name="待办事项" id="odoo_owl.todo_menu"
            parent="odoo_owl.menu_root"
            action="OdooTodo" sequence="20" />
    </data>
</odoo>
使用动态属性
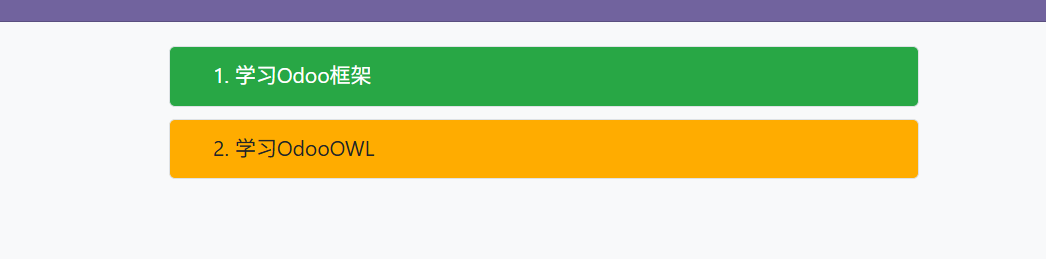
目前,TodoItem 组件在视觉上无法显示 todo 是否已完成。让我们通过使用 动态属性 来实现这一点。
- 如果
TodoItem根元素已完成后,添加 Bootstrap 类bg-success text-white,否则添加bg-warning text-dark。
该指令名为 t-att(代表属性),但它也可以用于设置类名(class)的值,以及 HTML 属性,例如输入框的 value。
实现效果:
参考代码:
todoitem.xml
<?xml version="1.0" encoding="UTF-8"?>
<templates xml:space="preserve">
  <t t-name="odoo_owl.TodoItem">
    <div class="d-flex align-items-center justify-content-between p-2 border rounded mb-2"
        t-att-class="props.todo.isCompleted ? 'bg-success text-white' : 'bg-warning text-dark'">
      <div class="form-check">
        <span>
          <t t-esc="props.todo.id"/>.
        </span>
        <label
          class="form-check-label"
        >
          <t t-esc="props.todo.description" />
        </label>
      </div>
    </div>
  </t>
</templates>
添加事件处理
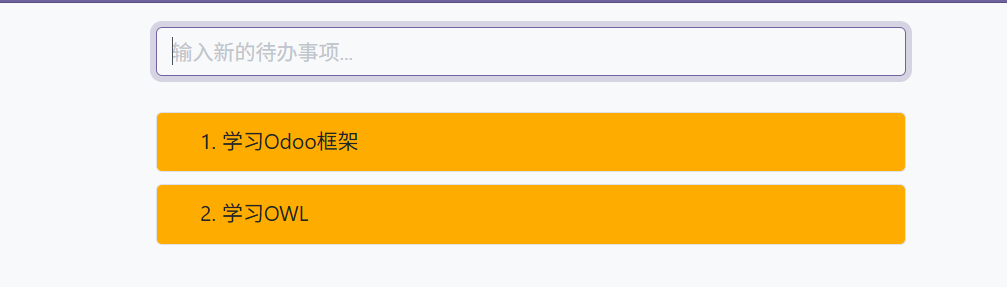
到目前为止,我们列表中的待办事项是硬编码的。让我们通过允许用户向列表中添加待办事项来使其更加有用。
- 在
TodoList组件中移除硬编码的值:jsthis.todos = useState([]); - 在任务列表上方添加一个输入框,占位符为“添加待办事项”
- 在
keyup事件上添加一个 event handler,名为addTodo - 实现
addTodo方法,用于检查是否按下了回车键(ev.keyCode === 13),如果是,则使用输入框的当前内容作为描述创建一个新的待办事项,并清空输入框中的所有内容。 - 确保待办事项具有唯一的 ID。可以只是一个每次添加待办事项时递增的计数器。
- 加分点:如果输入为空,则不要做任何操作。
另请参见
实现效果:
参考代码:
todolist.js
import { Component, useState } from "@odoo/owl";
import { registry } from "@web/core/registry";
import { TodoItem } from "./todoitem";
export class TodoList extends Component {
  static template = "odoo_owl.TodoList";
  static components = { TodoItem };
  static props = ["*"];
  setup() {
    this.state = useState({
      newTodo: "",
      nextId: 1,
    });
    this.todos = useState([]);
  }
  addTodo(ev) {
    if (ev.keyCode === 13 && this.state.newTodo != "") {
      this.todos.push({
        id: this.state.nextId++,
        description: this.state.newTodo,
        isCompleted: false,
      });
      this.state.newTodo = "";
    }
  }
}
//注册Action
registry.category("actions").add("odoo_owl.todo", TodoList);
todolist.xml
<?xml version="1.0" encoding="UTF-8"?>
<templates xml:space="preserve">
<t t-name="odoo_owl.TodoList">
<div style="text-align: center; max-height: 400px; overflow-y: auto; padding: 1rem;">
<div class="mb-4" style="max-width: 500px; margin: 0 auto;">
<input
t-model="state.newTodo"
type="text"
placeholder="输入新的待办事项..."
t-on-keyup="addTodo"
class="form-control"
/>
</div>
<div style="max-width: 500px; margin: 0 auto;">
<t t-foreach="this.todos" t-as="todo" t-key="todo.id">
<TodoItem todo="todo" />
</t>
</div>
</div>
</t>
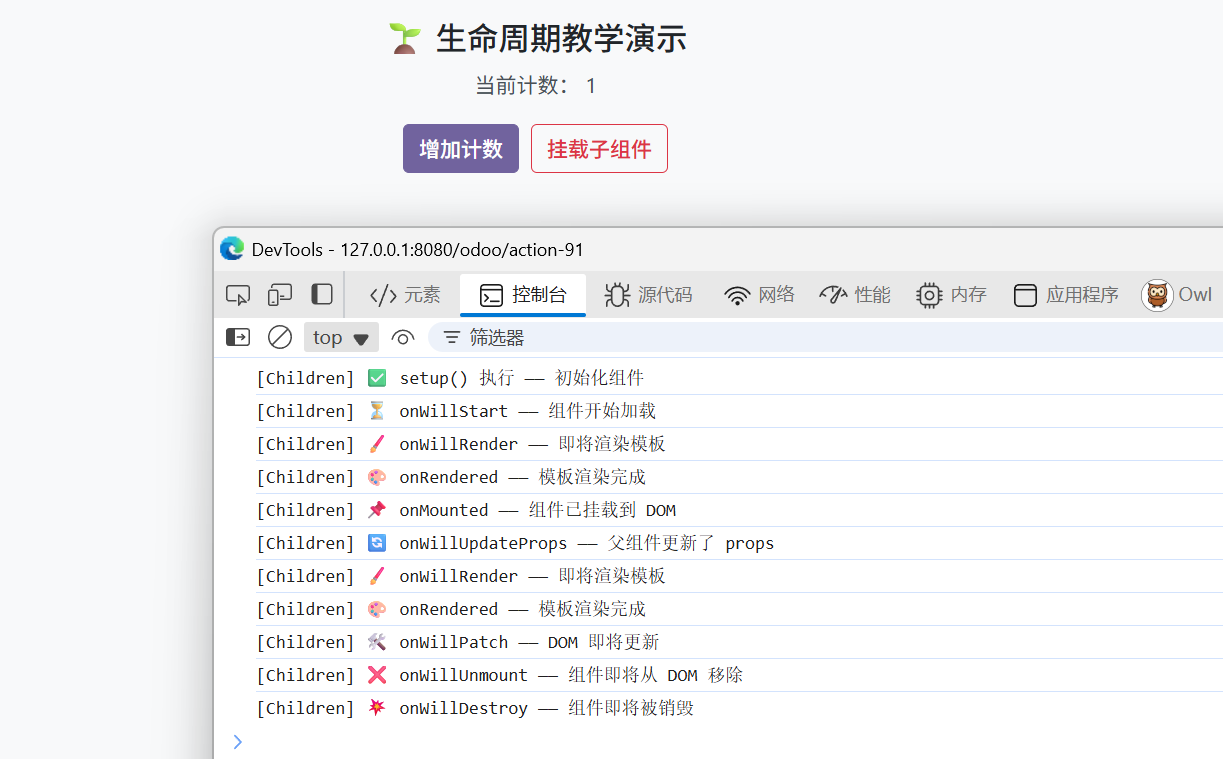
</templates>理论:组件生命周期与钩子(hooks)
到目前为止,我们已经看到一个钩子函数的示例:useState。钩子是特殊的函数,用于连接组件的内部机制。以 useState 为例,它会生成一个与当前组件关联的代理对象。 这也是为什么钩子函数必须在 setup 方法中调用,而不能在之后的任何时机调用的原因!

一个 Owl 组件会经历许多阶段:它可以被实例化、渲染、挂载、更新、分离、销毁…… 这就是组件的生命周期。上图展示了组件生命周期中最重要的事件(钩子函数以紫色表示)。大致来说,一个组件会被创建,然后更新(可能多次),最后被销毁。
Owl 提供了多种内置的钩子函数。所有这些函数都必须在 setup 函数中调用。例如,如果你想在组件挂载时执行某些代码,可以使用 onMounted 钩子:
setup() {
  onMounted(() => {
    // 在这里执行某些操作
  });
}
💡 提示
所有钩子函数都以 use 或 on 开头。例如:useState 或 onMounted。
以下是组件生命周期的简单示例:
示例代码:
odoo_owl/static/src/lifecycle/lifecycle.js
import { Component, useState } from "@odoo/owl";
import { registry } from "@web/core/registry";
import { Children } from "./children";

export class Lifecycle extends Component {
  static template = "odoo_owl.Lifecycle_test";
  static props = ["*"];
  static components = { Children };

  setup() {
    this.state = useState({
      count: 0,
      showChild: true,
    });
  }
  toggleChild() {
    this.state.showChild = !this.state.showChild;
  }
  increment() {
    this.state.count++;
  }
}
//注册Action
registry.category("actions").add("odoo_owl.lifecycle", Lifecycle);
odoo_owl/static/src/lifecycle/lifecycle.xml
<?xml version="1.0" encoding="UTF-8"?>
<templates xml:space="preserve">
  <t t-name="odoo_owl.Lifecycle_test">
    <div class="container text-center mt-4">
      <h2>🌱 生命周期教学演示</h2>
      <p>当前计数:
        <t t-esc="state.count" />
      </p>
      <div class="my-2">
        <button class="btn btn-primary me-2" t-on-click="increment">增加计数</button>
        <button class="btn btn-outline-danger" t-on-click="toggleChild">
          <t t-esc="state.showChild ? '卸载子组件' : '挂载子组件'" />
        </button>
      </div>
      <div class="mt-4">
        <t t-if="state.showChild">
          <Children count="state.count" />
        </t>
      </div>
    </div>
  </t>
</templates>
odoo_owl/static/src/lifecycle/children.js
import {
  Component,
  onWillStart,
  onWillRender,
  onRendered,
  onMounted,
  onWillUpdateProps,
  onWillPatch,
  onPatched,
  onWillUnmount,
  onWillDestroy,
} from "@odoo/owl";

export class Children extends Component {
  static template = "odoo_owl.Children";
  static props = {
    count: { type: String, optional: true },
  };

  setup() {
    console.log("[Children] ✅ setup() 执行 —— 初始化组件");
    // 生命周期函数注册
    onWillStart(async () => {
      console.log("[Children] ⏳ onWillStart —— 组件开始加载");
    });
    onWillRender(() => {
      console.log("[Children] 🖌️ onWillRender —— 即将渲染模板");
    });
    onRendered(() => {
      console.log("[Children] 🎨 onRendered —— 模板渲染完成");
    });
    onMounted(() => {
      console.log("[Children] 📌 onMounted —— 组件已挂载到 DOM");
    });
    onWillUpdateProps(() => {
      console.log("[Children] 🔄 onWillUpdateProps —— 父组件更新了 props");
    });
    onWillPatch(() => {
      console.log("[Children] 🛠️ onWillPatch —— DOM 即将更新");
    });
    onPatched(() => {
      console.log("[Children] ✅ onPatched —— DOM 更新完成");
    });
    onWillUnmount(() => {
      console.log("[Children] ❌ onWillUnmount —— 组件即将从 DOM 移除");
    });
    onWillDestroy(() => {
      console.log("[Children] 💥 onWillDestroy —— 组件即将被销毁");
    });
  }
}
odoo_owl/static/src/lifecycle/children.xml
<?xml version="1.0" encoding="UTF-8"?>
<templates xml:space="preserve">
  <t t-name="odoo_owl.Children">
    <h1>我是子组件,当前父组件传来的数字为:
      <t t-esc="props.count"/>
    </h1>
  </t>
</templates>
menu_views.xml
<odoo>
    <data>
        <record model="ir.actions.client" id="OdooOWL">
            <field name="name">Playground</field>
            <field name="tag">odoo_owl.playground</field>
        </record>
        <record model="ir.actions.client" id="OdooTodo">
            <field name="name">Todo</field>
            <field name="tag">odoo_owl.todo</field>
        </record>
        <record model="ir.actions.client" id="OdooLifeCity">
            <field name="name">OdooLifeCity</field>
            <field name="tag">odoo_owl.lifecycle</field>
        </record>
        <menuitem name="Odoo OWL" id="odoo_owl.menu_root" groups="base.group_user"
            web_icon="odoo_owl,static/description/icon.png" />
        <menuitem name="Playground" id="odoo_owl.playground_menu"
            parent="odoo_owl.menu_root"
            action="OdooOWL" sequence="10" />
        <menuitem name="待办事项" id="odoo_owl.todo_menu"
            parent="odoo_owl.menu_root"
            action="OdooTodo" sequence="20" />
        <menuitem name="生命周期" id="odoo_owl.lifecity_menu"
            parent="odoo_owl.menu_root"
            action="OdooLifeCity" sequence="30" />
    </data>
</odoo>
效果展示:
聚焦输入
让我们看看如何通过 t-ref 和 useRef 访问 DOM。主要思想是:你需要在组件模板中使用 t-ref 来标记目标元素,例如:
<div t-ref="some_name">hello</div>然后你可以在 JS 中通过 useRef 钩子访问它。然而,这里有一个值得注意的问题:当组件被创建时,对应的 HTML 元素实际上还不存在,它只有在组件挂载(mounted)之后才存在。但所有钩子都必须在 setup 方法中调用。因此,useRef 返回的是一个对象,其中的 el(element)属性只会在组件挂载之后才被定义。
setup() {
   this.myRef = useRef('some_name');
   onMounted(() => {
      console.log(this.myRef.el);
   });
}- 让我们聚焦上一节中的输入框。这个操作应该从
TodoList组件挂载时聚焦(注意,HTML 的<input>元素上有一个.focus()方法)。 - 加分项:将该逻辑提取为一个专用的 Hook,命名为
useAutofocus,并存放在一个新的文件odoo_owl/static/src/hooks/utils.js中。
📌 提示:
建议引用对象变量以 Ref 结尾,以清楚表明它们是特殊的引用对象:
this.inputRef = useRef('input');实现效果:

代码示例:
odoo_owl/static/src/hooks/utils.js
import { useRef, onMounted } from "@odoo/owl";
/**
 * 自动聚焦指定的 DOM 元素
 * @param {string} refName - t-ref 的名称
 * @returns {object} ref 对象(包含 el 属性)
 */
export function useAutofocus(refName) {
  const elementRef = useRef(refName);

  onMounted(() => {
    if (elementRef.el && typeof elementRef.el.focus === "function") {
      elementRef.el.focus();
    }
  });

  return elementRef;
}
todolist.js
import { Component, useState } from "@odoo/owl";
import { registry } from "@web/core/registry";
import { useAutofocus } from "../hooks/utils";
import { TodoItem } from "./todoitem";
export class TodoList extends Component {

  static template = "odoo_owl.TodoList";
  static components = { TodoItem };
  static props = ["*"];
  setup() {
    this.state = useState({
      newTodo: "",
      nextId: 1,
    });
    this.todos = useState([])
    this.inputRef = useAutofocus("todoInput"); // 使用自定义 hook
  }
  addTodo(ev) {
    if (ev.keyCode === 13 && this.state.newTodo != "") {
      this.todos.push({ id: this.state.nextId++, description: this.state.newTodo, isCompleted: false });
      this.state.newTodo = "";
    }
  }
}
//注册Action
registry.category("actions").add("odoo_owl.todo", TodoList);
todolist.xml
<?xml version="1.0" encoding="UTF-8"?>
<templates xml:space="preserve">
<t t-name="odoo_owl.TodoList">
<div style="text-align: center; max-height: 400px; overflow-y: auto; padding: 1rem;">
<div class="mb-4" style="max-width: 500px; margin: 0 auto;">
<input
t-model="state.newTodo"
type="text"
placeholder="输入新的待办事项..."
t-on-keyup="addTodo"
class="form-control"
t-ref="todoInput"
/>
</div>
<div style="max-width: 500px; margin: 0 auto;">
<t t-foreach="this.todos" t-as="todo" t-key="todo.id">
<TodoItem todo="todo" />
</t>
</div>
</div>
</t>
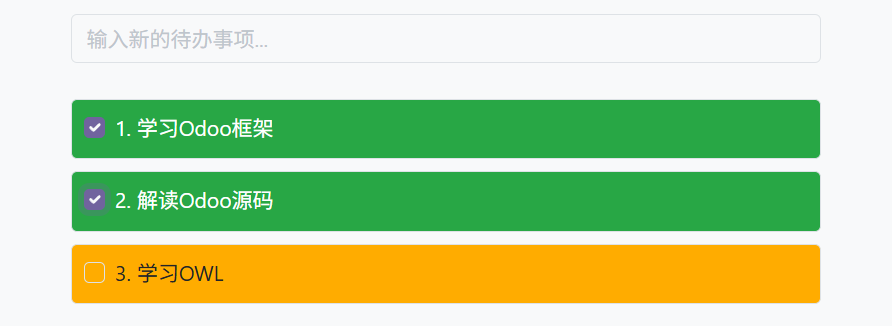
</templates>代办事项状态切换
现在,让我们添加一个新功能:标记待办事项为已完成。这其实比看起来更复杂一些,因为:状态的拥有者(父组件)并不是负责显示该状态的组件(子组件)。
因此,TodoItem 组件需要通知它的父组件,某个 todo 项目的状态需要被切换。一种经典的方式是添加一个回调属性 toggleState。
- 在任务 ID 前添加一个
type="checkbox"的<input>元素该复选框应在 isCompleted 为 true 时被选中。
📌 提示:
如果通过 t-att 指令计算的属性值为假值(falsy),Owl 不会创建该属性。
- 向
TodoItem添加回调属性toggleState - 在
TodoItem组件的输入框上添加一个change事件处理程序,并确保它使用待办事项 ID 调用toggleState函数。
效果展示:
参考代码:
TodoList组件
todolist.js
import { Component, useState } from "@odoo/owl";
import { registry } from "@web/core/registry";
import { useAutofocus } from "../hooks/utils";
import { TodoItem } from "./todoitem";
export class TodoList extends Component {

  static template = "odoo_owl.TodoList";
  static components = { TodoItem };
  static props = ["*"];
  setup() {
    this.state = useState({
      newTodo: "",
      nextId: 1,
    });
    this.todos = useState([])
    this.inputRef = useAutofocus("todoInput"); // 使用自定义 hook
  }
  addTodo(ev) {
    if (ev.keyCode === 13 && this.state.newTodo != "") {
      this.todos.push({ id: this.state.nextId++, description: this.state.newTodo, isCompleted: false });
      this.state.newTodo = "";
    }
  }
  toggleState(todo) {
    todo.isCompleted = !todo.isCompleted;
  }
}
//注册Action
registry.category("actions").add("odoo_owl.todo", TodoList);
todolist.xml
<?xml version="1.0" encoding="UTF-8"?>
<templates xml:space="preserve">
  <t t-name="odoo_owl.TodoList">
    <div style="text-align: center; max-height: 400px; overflow-y: auto; padding: 1rem;">
      <div class="mb-4" style="max-width: 500px; margin: 0 auto;">
        <input
            t-model="state.newTodo"
            type="text"
            placeholder="输入新的待办事项..."
            t-on-keyup="addTodo"
            class="form-control"
            t-ref="todoInput"
          />
      </div>
      <div style="max-width: 500px; margin: 0 auto;">
        <t t-foreach="this.todos" t-as="todo" t-key="todo.id">
          <TodoItem todo="todo" toggleState.bind="toggleState" />
        </t>
      </div>
    </div>
  </t>
</templates>
TodoItem组件
todoitem.js
import { Component } from "@odoo/owl";

export class TodoItem extends Component {
  static template = "odoo_owl.TodoItem";
  static props = {
    todo:
    {
      type: Array,
      validate(todo) {
        return (
          typeof todo.id === "number" &&
          typeof todo.description === "string" &&
          typeof todo.isCompleted === "boolean"
        );
      }
    },
    toggleState: { type: Function, optional: true },
  };
}
todoitem.xml
<?xml version="1.0" encoding="UTF-8"?>
<templates xml:space="preserve">
<t t-name="odoo_owl.TodoItem">
<div class="d-flex align-items-center justify-content-between p-2 border rounded mb-2"
t-att-class="props.todo.isCompleted ? 'bg-success text-white' : 'bg-warning text-dark'">
<div class="form-check">
<input
type="checkbox"
class="form-check-input"
t-att-checked="props.todo.isCompleted"
t-on-change="() => props.toggleState(props.todo)"
/>
<span>
<t t-esc="props.todo.id"/>.
</span>
<label
class="form-check-label"
>
<t t-esc="props.todo.description" />
</label>
</div>
</div>
</t>
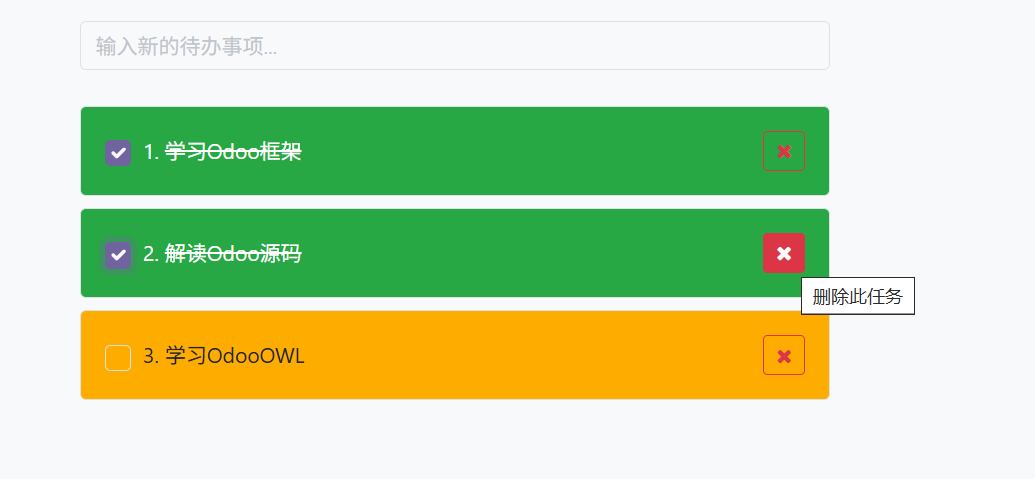
</templates>删除待办事项
最后一步是让用户能够删除一个待办事项。
- 在
TodoItem中添加一个新的回调属性removeTodo。 - 在
TodoItem组件的模板中插入<i class="fa fa-remove"/> - 每当用户点击它时,应该调用
removeTodo方法。 - 加分项:这是我们代办事项示例的最后一个功能,试着优化样式
效果展示:
参考代码:
TodoList组件
todolist.js
import { Component, useState } from "@odoo/owl";
import { registry } from "@web/core/registry";
import { useAutofocus } from "../hooks/utils";
import { TodoItem } from "./todoitem";
export class TodoList extends Component {

  static template = "odoo_owl.TodoList";
  static components = { TodoItem };
  static props = ["*"];
  setup() {
    this.state = useState({
      newTodo: "",
      nextId: 1,
    });
    this.todos = useState([])
    this.inputRef = useAutofocus("todoInput"); // 使用自定义 hook
  }
  addTodo(ev) {
    if (ev.keyCode === 13 && this.state.newTodo != "") {
      this.todos.push({ id: this.state.nextId++, description: this.state.newTodo, isCompleted: false });
      this.state.newTodo = "";
    }
  }
  toggleState(todo) {
    todo.isCompleted = !todo.isCompleted;
  }
  removeTodo(todo) {
    const index = this.todos.findIndex(t => t.id === todo.id);
    if (index !== -1) {
      this.todos.splice(index, 1);
    }
  }
}
//注册Action
registry.category("actions").add("odoo_owl.todo", TodoList);
todolist.xml
<?xml version="1.0" encoding="UTF-8"?>
<templates xml:space="preserve">
  <t t-name="odoo_owl.TodoList">
    <div style="text-align: center; max-height: 400px; overflow-y: auto; padding: 1rem;">
      <div class="mb-4" style="max-width: 500px; margin: 0 auto;">
        <input
            t-model="state.newTodo"
            type="text"
            placeholder="输入新的待办事项..."
            t-on-keyup="addTodo"
            class="form-control"
            t-ref="todoInput"
          />
      </div>
      <div style="max-width: 500px; margin: 0 auto;">
        <t t-foreach="this.todos" t-as="todo" t-key="todo.id">
          <TodoItem todo="todo" toggleState.bind="toggleState" removeTodo.bind="removeTodo" />
        </t>
      </div>
    </div>
  </t>
</templates>
TodoItem组件
todoitem.js
import { Component } from "@odoo/owl";

export class TodoItem extends Component {
  static template = "odoo_owl.TodoItem";
  static props = {
    todo:
    {
      type: Array,
      validate(todo) {
        return (
          typeof todo.id === "number" &&
          typeof todo.description === "string" &&
          typeof todo.isCompleted === "boolean"
        );
      }
    },
    toggleState: { type: Function, optional: true },
    removeTodo: { type: Function, optional: true },
  };
}
todoitem.xml
<?xml version="1.0" encoding="UTF-8"?>
<templates xml:space="preserve">
  <t t-name="odoo_owl.TodoItem">
    <div class="d-flex justify-content-between align-items-center p-3 mb-2 border rounded"
        t-att-class="props.todo.isCompleted ? 'bg-success text-white' : 'bg-warning text-dark'">
      <div class="d-flex align-items-center">
        <input
          type="checkbox"
          class="form-check-input me-2"
          style="width: 1.1rem; height: 1.1rem;"
          t-att-checked="props.todo.isCompleted || undefined"
          t-on-change="() => props.toggleState(props.todo)" />
        <span class="me-1">
          <t t-esc="props.todo.id" />.
        </span>
        <span
          t-att-style="props.todo.isCompleted ? 'text-decoration: line-through;' : ''">
          <t t-esc="props.todo.description" />
        </span>
      </div>
      <button
        class="btn btn-outline-danger btn-sm"
        title="删除此任务"
        t-on-click="() => props.removeTodo(props.todo)">
        <i class="fa fa-remove"/>
      </button>
    </div>
  </t>
</templates>
插槽 (Slots)
在之前的练习中,我们构建了一个简单的 Card 组件。但说实话,它的功能非常有限。如果我们想在卡片中显示一些任意内容,比如一个子组件,该怎么办呢?目前这种方式并不奏效,因为卡片的内容是通过字符串来描述的。然而,如果我们可以将内容描述为一段模板,那就会非常方便。
这正是 Owl 的插槽(slot)系统的用途:用于编写通用组件。
让我们修改 Card 组件以使用插槽(slots):
- 移除
content属性; - 使用默认插槽来定义卡片的主体;
- 插入一些带有任意内容(例如 Counter 组件)的卡片;
- (加分项)添加属性验证;
效果展示:
.uKq4TBUd.png)
参考代码:
Card组件
card.js
import { Component } from "@odoo/owl";

export class Card extends Component {
  static template = "odoo_owl.Card";
  static props = {
    title: { type: String, optional: true, validate: (title) => title.length < 20 },
    slots: { type: Object, optional: true },
  };
}
card.xml
<?xml version="1.0" encoding="UTF-8"?>
<templates xml:space="preserve">
  <t t-name="odoo_owl.Card">
    <div class="card d-inline-block m-2" style="width: 18rem;">
      <div class="card-header d-flex justify-content-between align-items-center">
        <h5 class="card-title mb-0">
          <t t-esc="props.title"/>
        </h5>
      </div>
      <div class="card-body">
        <t t-slot="default" />
      </div>
    </div>
  </t>
</templates>
Playground组件
playground.js
import { Component, useState, markup, } from "@odoo/owl";
import { registry } from "@web/core/registry";
import { Counter } from "./counter";
import { Card } from "./card";
export class Playground extends Component {
  static template = "odoo_owl.Playground";
  static props = ["*"];
  static components = { Counter, Card };
  setup() {
    this.state = useState({
      value1: "<div class='text-primary'>some content</div>",
      value2: markup("<div class='text-primary'>some content</div>"),
      sum: 0
    })
  }
  incrementSum() {
    this.state.sum++;
  }
}
//注册Action
registry.category("actions").add("odoo_owl.playground", Playground);
playground.xml
<?xml version="1.0" encoding="UTF-8"?>
<templates xml:space="preserve">
  <t t-name="odoo_owl.Playground">
    <div style="text-align: center;height: 100%;overflow-x: auto;">
      <h1 class="text-center mb-4">Hello World!</h1>
      <hr/>
      <h1 class="text-center mb-4">Counter子组件</h1>
      <Counter/>
      <hr/>
      <h1 class="text-center mb-4">Card子组件</h1>
      <Card title="'什么是Props?'">
        <p class="card-text">Props是父组件向子组件传递数据的一种方式</p>
      </Card>
      <Card title="'Props能干什么?'">
        <p class="card-text">Props能够在子组件中定义数据,并且可以在父组件中传递数据给子组件</p>
      </Card>
      <hr/>
      <h1 class="text-center mb-4">markup展示</h1>
      <Card title="'未使用markup'">
        <p class="card-text"><t t-out="state.value1"/></p>
      </Card>
      <Card title="'使用markup'" description="state.value2" >
        <p class="card-text"><t t-out="state.value2"/></p>
      </Card>
      <hr/>
      <h1 class="text-center mb-4">Props验证</h1>
      <Card title="'Props验证....'">
        <p class="card-text">如果title的长度超过20,那么就会报错</p>
      </Card>
      <hr/>
      <h1 class="text-center mb-4">父子通讯</h1>
      <div class="d-flex justify-content-center align-items-center gap-4 mb-4">
        <Counter onIncrement.bind="incrementSum"/>
        <Counter onIncrement.bind="incrementSum"/>
      </div>
      <div class="text-center">
        <p class="fs-5">点击总数:
          <t t-esc="state.sum"/>
        </p>
      </div>
      <hr/>
      <h1 class="text-center mb-4">插槽使用:</h1>
      <Card title="'插入Counter组件'">
        <Counter/>
      </Card>
    </div>
  </t>
</templates>
使用 t-if
最后,让我们为 Card 组件添加一个功能,使其更具互动性:我们希望添加一个按钮,用于切换内容的显示与隐藏。
- 为
Card组件添加一个状态,用于跟踪内容当前是否展开(默认为展开); - 在模板中使用 t-if 条件渲染来控制内容的显示;
- 在头部添加一个按钮,并修改代码,使其在点击时切换状态。
效果展示:

参考代码:
card.js
import { Component, useState } from "@odoo/owl";

export class Card extends Component {
  static template = "odoo_owl.Card";
  static props = {
    title: { type: String, optional: true, validate: (title) => title.length < 20 },
    slots: { type: Object, optional: true },
  };
  setup() {
    this.state = useState({
      isOpen: true
    })
  }
  toggleContent() {
    this.state.isOpen = !this.state.isOpen
  }
}
card.xml
<?xml version="1.0" encoding="UTF-8"?>
<templates xml:space="preserve">
  <t t-name="odoo_owl.Card">
    <div class="card d-inline-block m-2" style="width: 18rem;">
      <div class="card-header d-flex justify-content-between align-items-center">
        <h5 class="card-title mb-0">
          <t t-esc="props.title"/>
        </h5>
        <button
          class="btn btn-sm btn-outline-secondary"
          t-on-click="toggleContent"
          t-att-title="state.isOpen ? '隐藏内容' : '显示内容'">
          <t t-esc="state.isOpen ? '▲' : '▼'"/>
        </button>
      </div>
      <div class="card-body" t-if="state.isOpen">
        <t t-slot="default" />
      </div>
    </div>
  </t>
</templates>